IMPORTANT NOTE: This article refers to WP Ultimo version 1.x. If you're using v2, see this article.
A powerful feature of a premium network is the ability to offer your clients a chance to attach a top-level domain to their sites. After all, joesbikeshop.com sounds much more professional than joesbikeshop.yournetwork.com, right? That’s why WP Ultimo offers this feature baked-in, and you don't need to rely on other third-party plugins.
What’s domain mapping?
As the name suggests, domain mapping is the ability offered by WP Ultimo to take in a request for a custom domain and map that request to the corresponding site in the network with that particular domain attached.
How to setup domain mapping on your WP Ultimo Network
Domain mapping requires some setting up on your part to work. Thankfully, WP Ultimo automates your hard work so you can easily meet the requirements.
During WP Ultimo installation, on the Settings part, you can check the Enable Domain Mapping option.
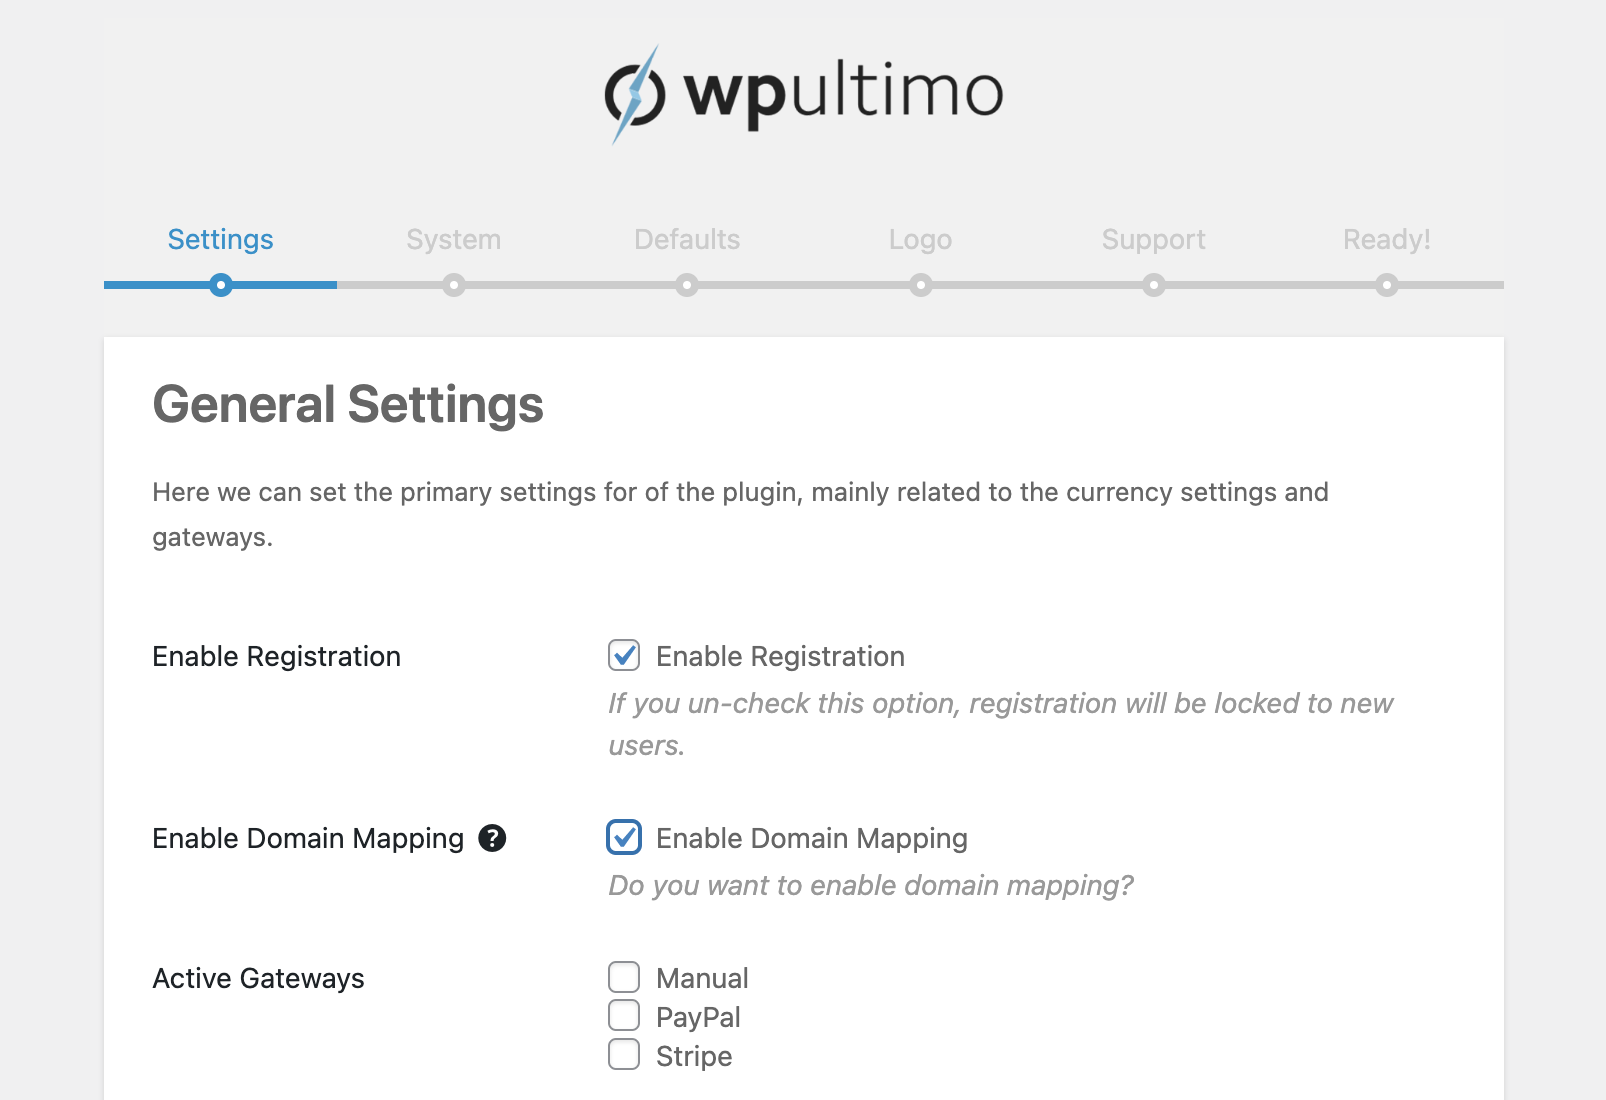
Alternatively, you can also enable this option on WP Ultimo > Settings > Domain Mapping and SSL.
%2016.51.56.png)
NOTE: To have the custom domain mapping working correctly, it is important to make sure you have the sunrise.php file from your wp-ultimo directory copied to your wp-content directory, and to have added define('SUNRISE', true); to your wp-config.php file, as shown in the WP Ultimo Wizard Setup.
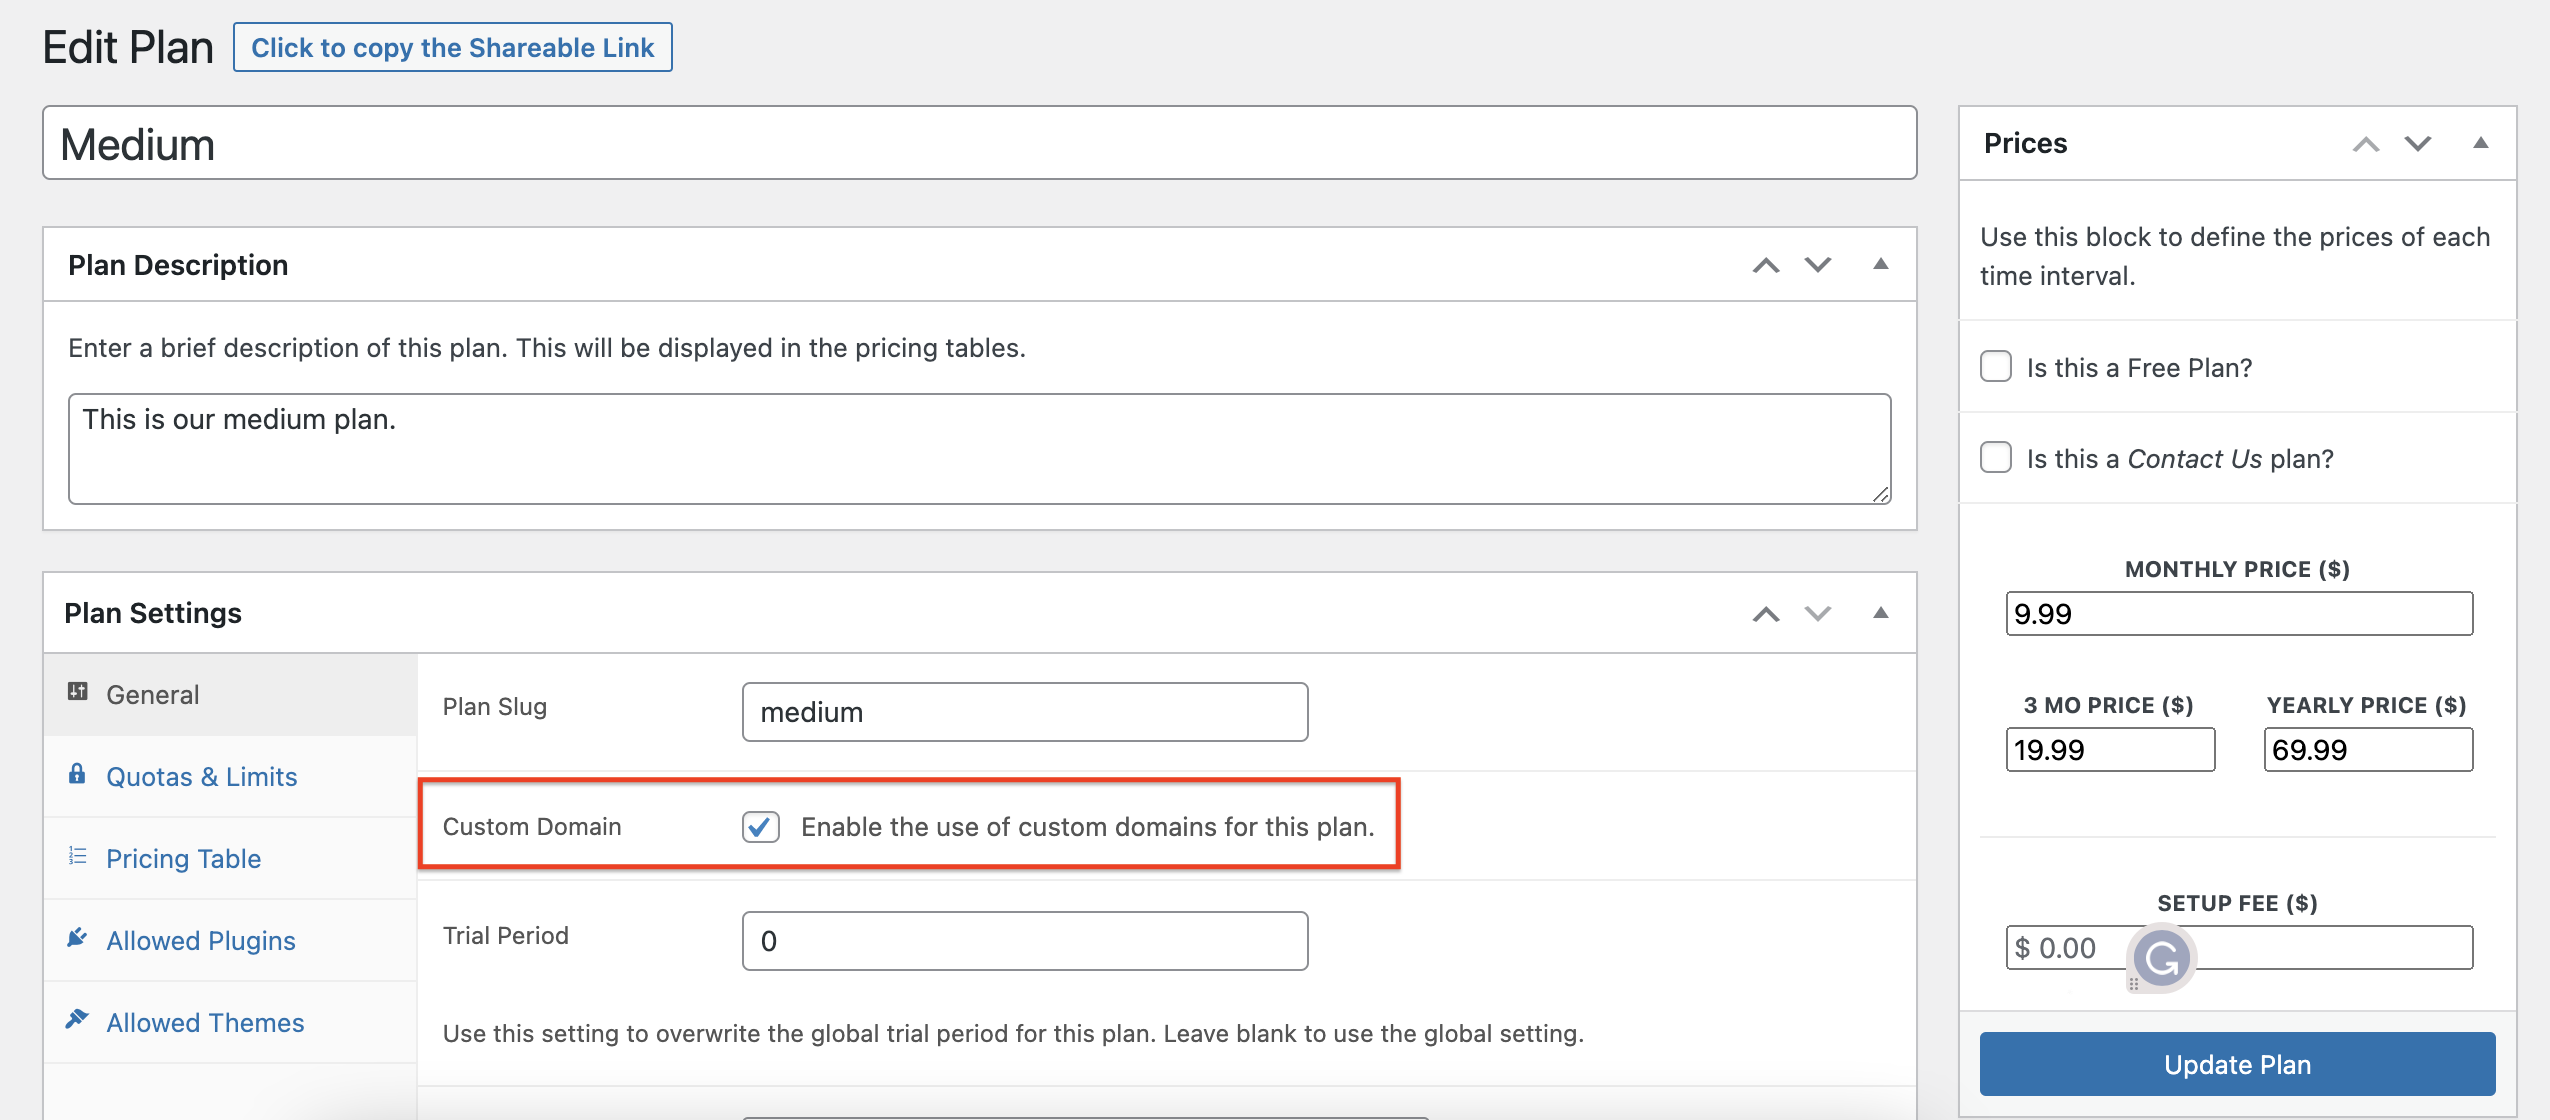
To make custom domains available to plans, check the option inside the specific plan editing page, on the Plan Settings tab.
Making sure the domain DNS settings are properly configured
For a mapping to work, you need to make sure the domain you are planning to map is pointing to your Network’s IP address. Note that you need the Network IP address - the IP address of the domain where WP Ultimo is installed - not the IP address of the custom domain you want to map. To search for the IP address of a specific domain, we suggest going to Site24x7, for example.
To correctly map the domain, you need to add an A RECORD on your DNS configuration pointing to that IP address. DNS management varies greatly between different domain registrars, but there are plenty of tutorials online covering that if you search for “ Creating A Record on XXXX” where XXXX is your domain registrar (ex.: " Creating A Record on GoDaddy”).
If you find yourself having trouble getting this to work, contact your domain registrar support and they will be able to help you with this part.
If you plan to allow your clients to map their own domains, they will have to do the work on this part themselves. Point them towards their registrar support system if they find themselves unable to create the A Record.
Mapping a Custom Domain Name
As a Super Admin
When you are logged in as super admin on your network, you can add and manage custom domain names by going to your Sites menu and clicking to access the site's option.
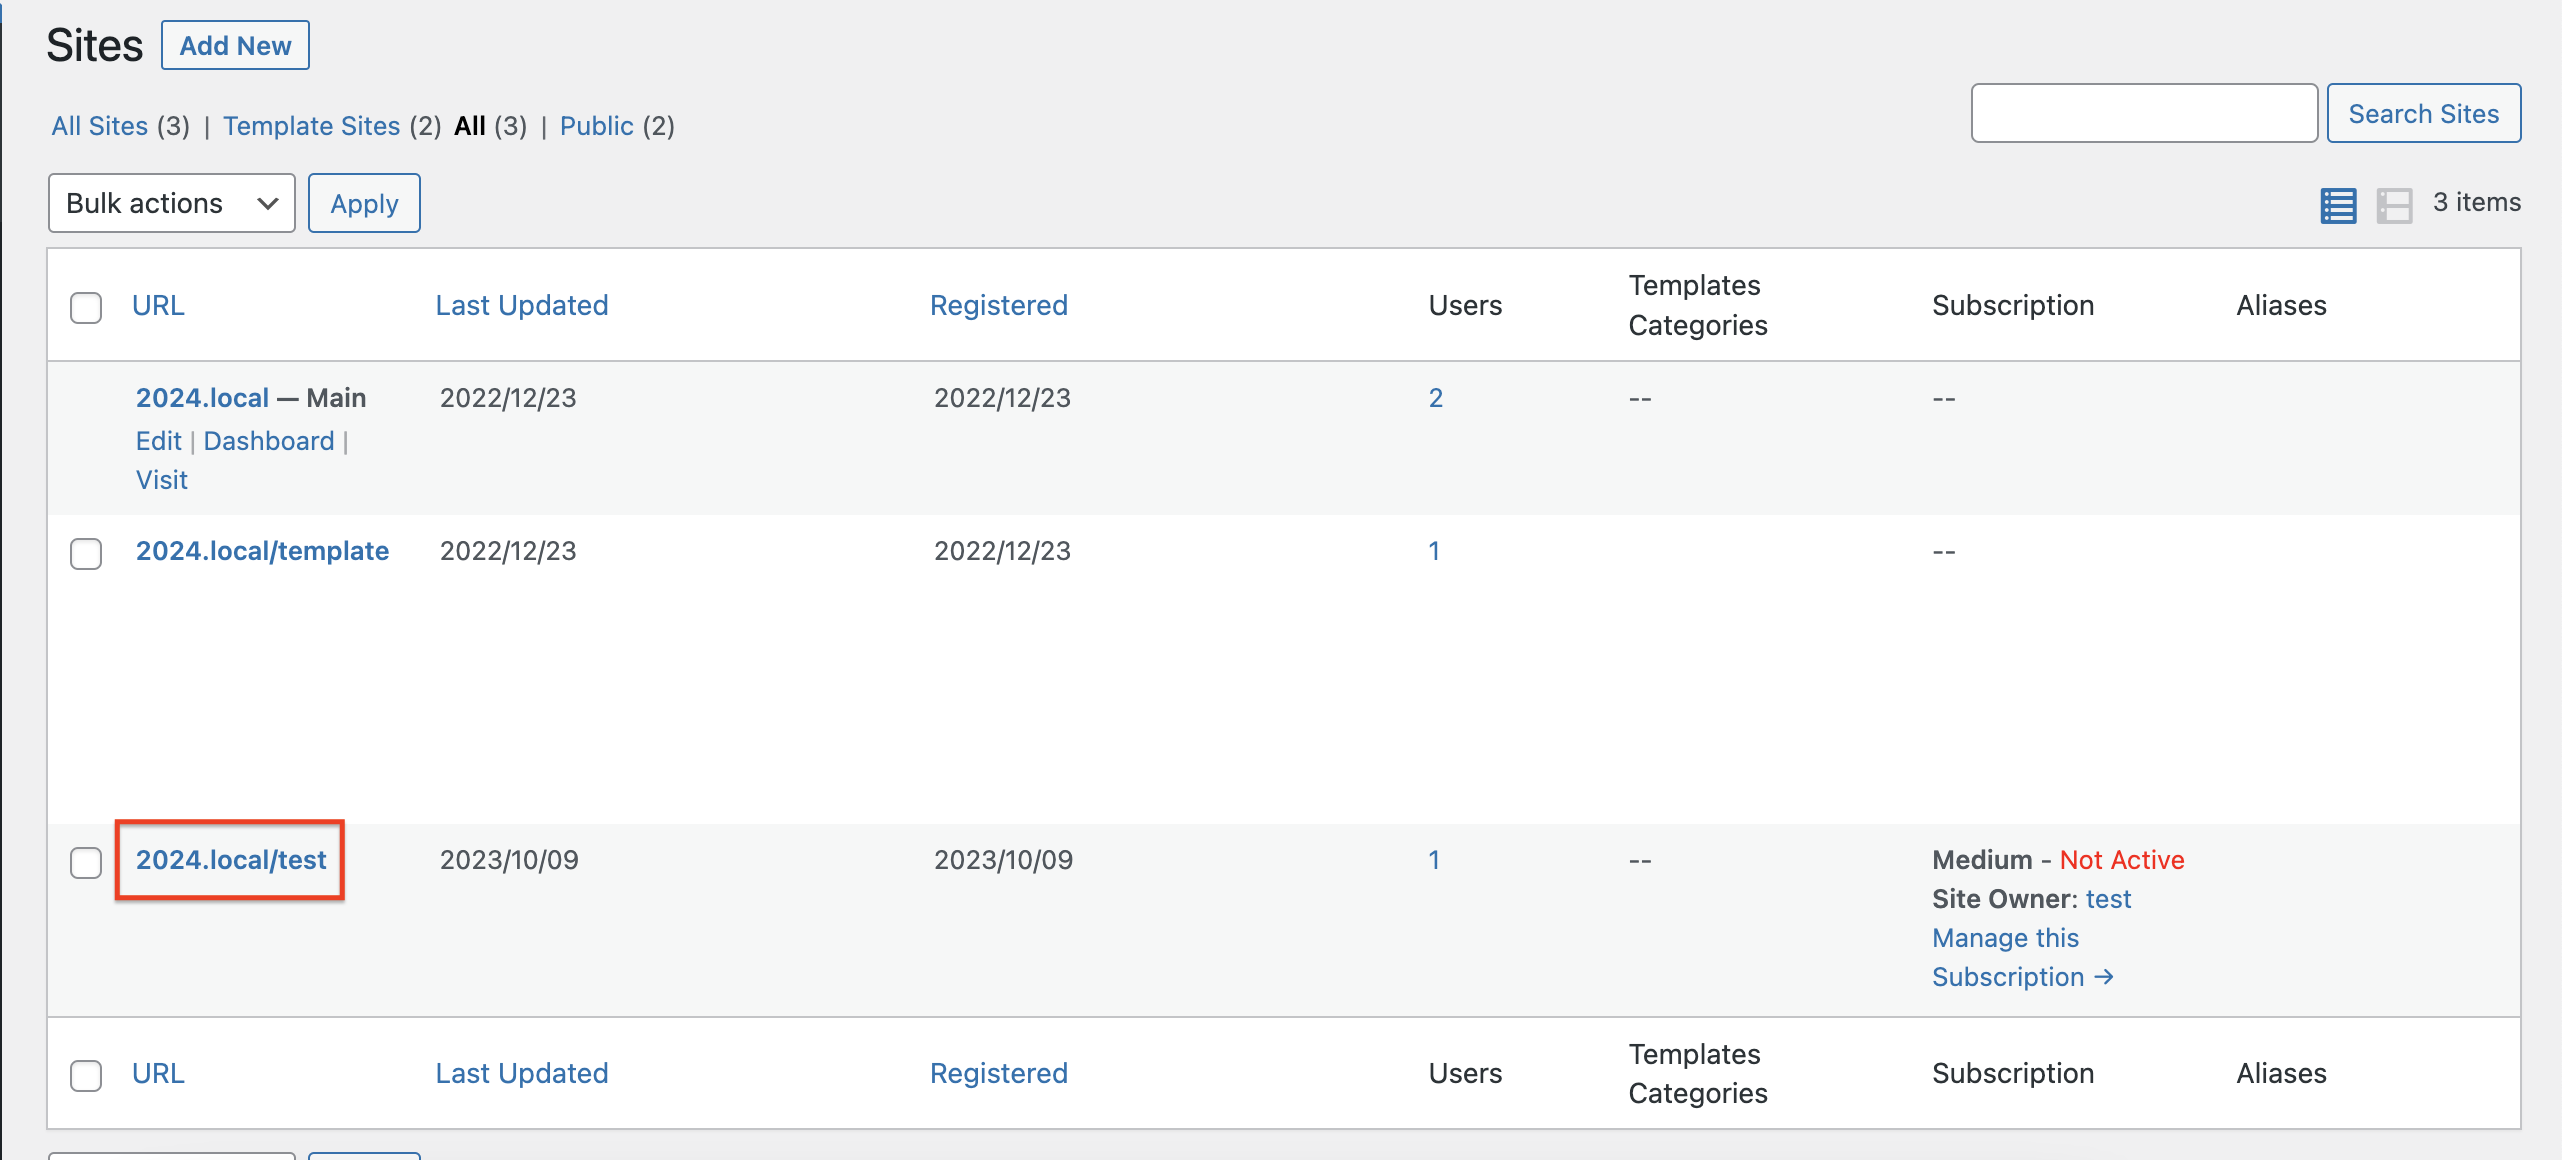
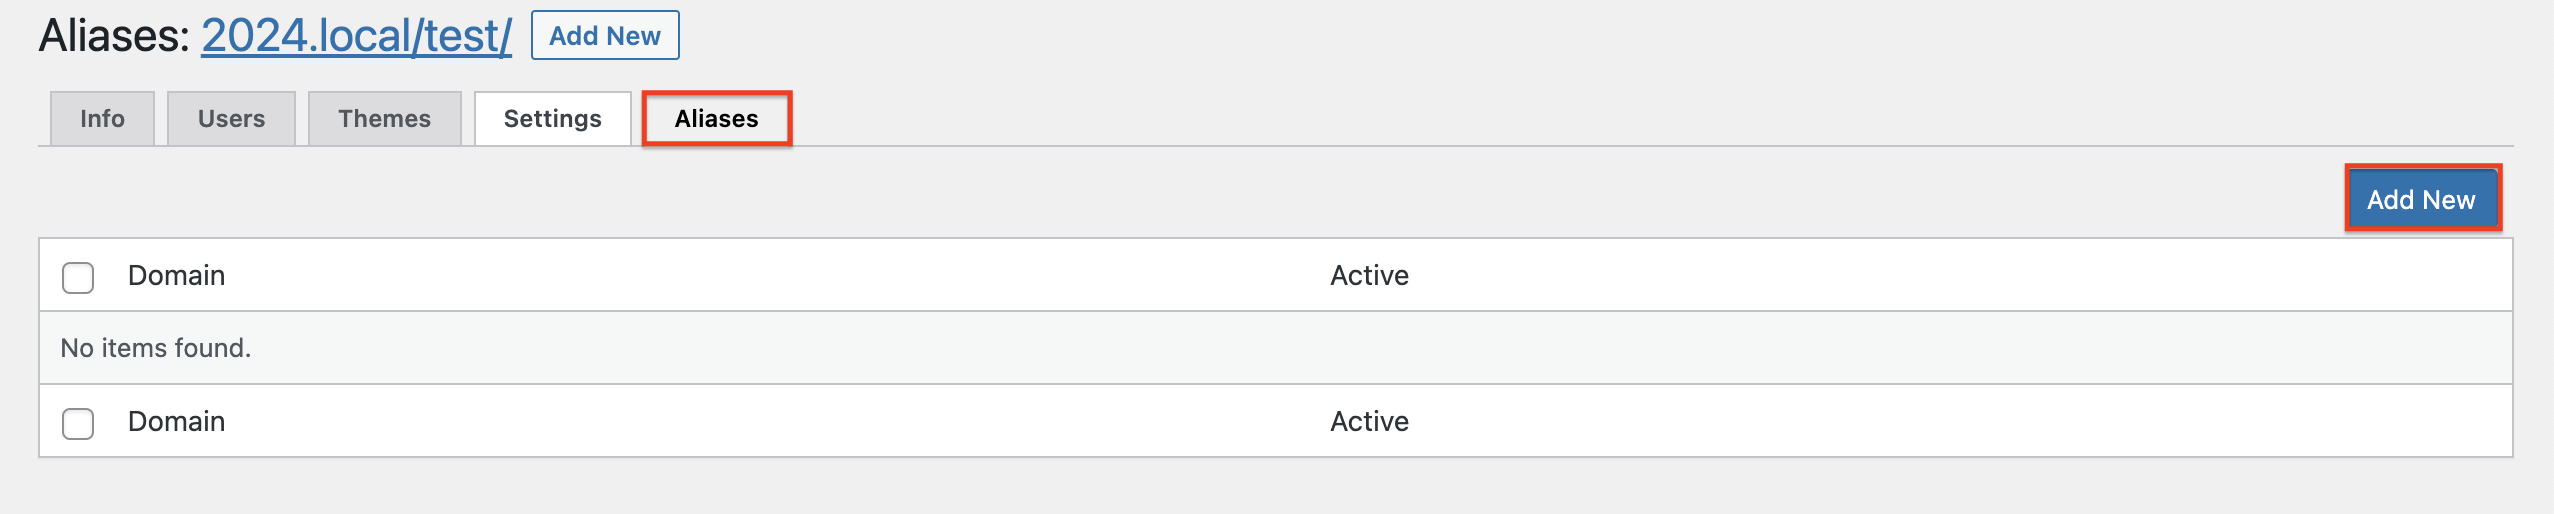
Go to the Aliases tab and click on Add New.
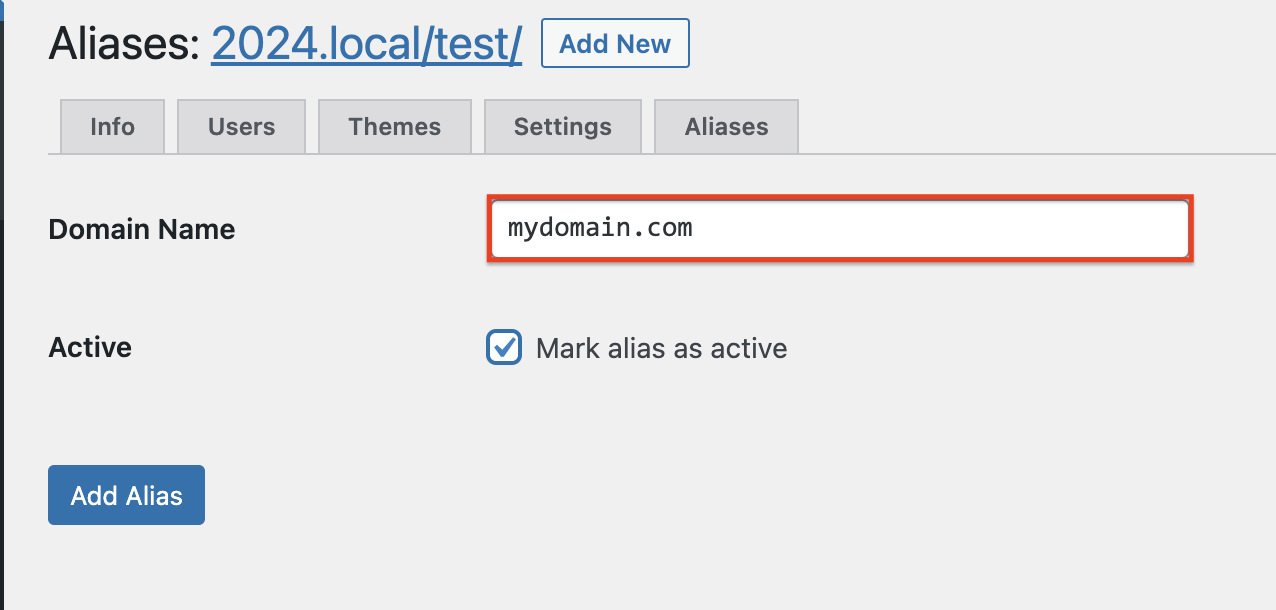
Add the domain name, mark it as active, and click on Add Alias.
On Your Customer's Account Page
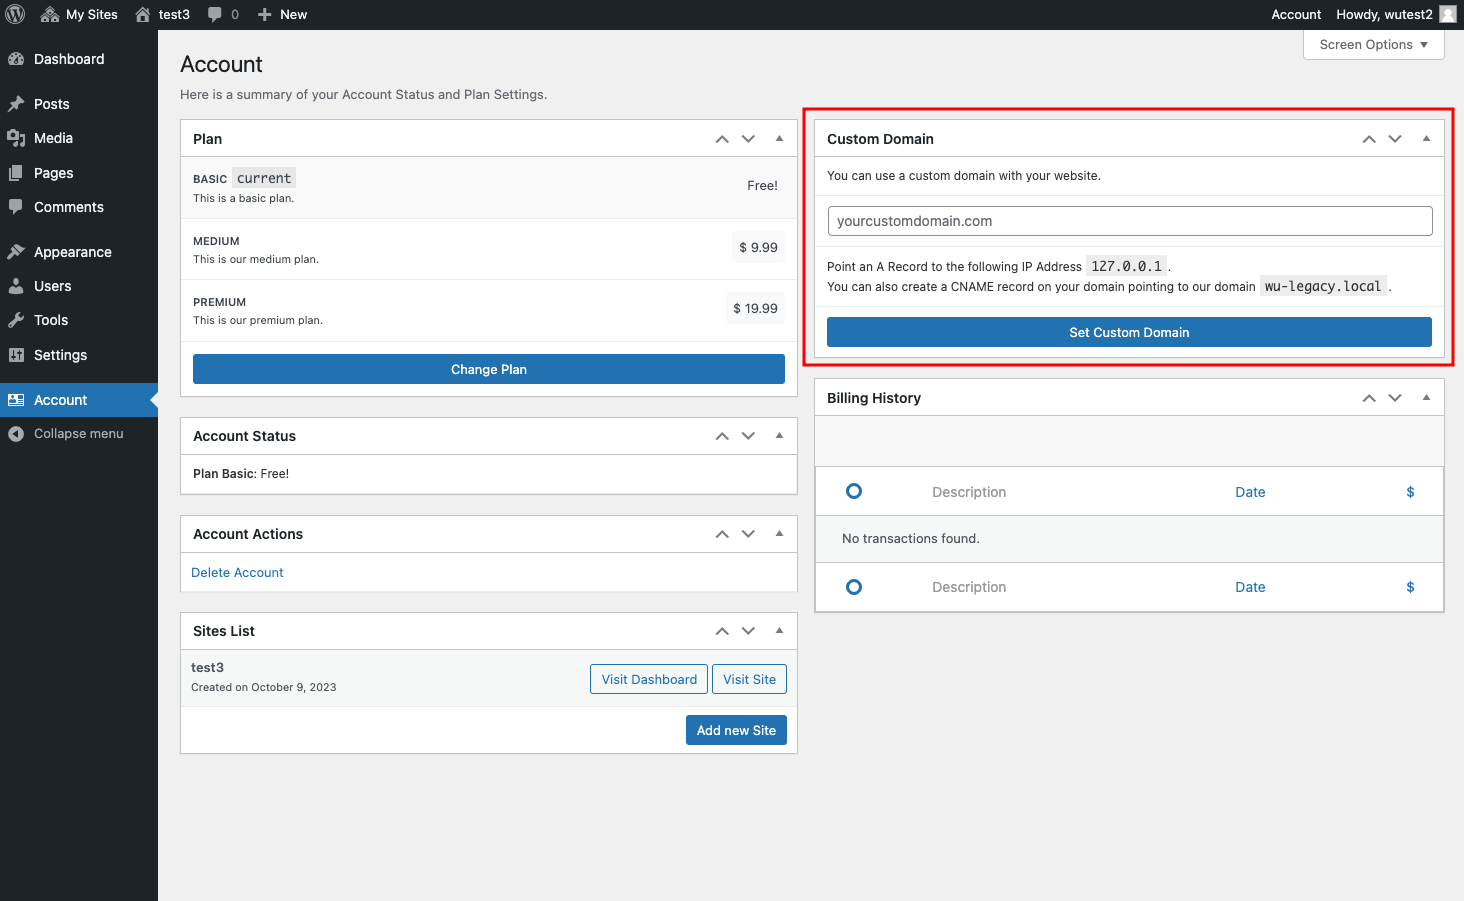
On the right column of your customer's account page, there's a module where you can set the custom domain.
Just add the domain and click on Set Custom Domain.